Coffee Kahlua Crown Cake

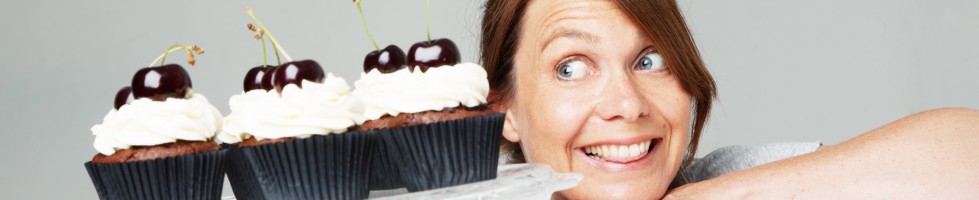
The very wonderful Mary Berry has filmed a new series ‘Mary Berry Cooks’ which aired this week (Mondays 8.30pm, BBC2), and this week’s subject matter was Afternoon Tea.

This is a type of meal which is fairly close to my heart for obvious reasons and also a treat I like to indulge in, in celebration of life events. The idea that on a regular basis anyone needs 4 ‘meals’ a day is fairly ridiculous, but like the feasting we enjoy at Christmas, weddings and other high days and holidays, Afternoon Tea, preferably at a posh hotel and accompanied by a glass of Champagne to go with the tea and goodies really must sum up what we Brits do best to make you feel special. I had Tea at the Ritz as part of my Hen Party (a million years ago), and I had no problem convincing a whole bunch of female friends and relatives to munch through fabulous sandwiches, scones and cakes for an hour or two, despite the usually obsequious diets most of them generally adhered to.

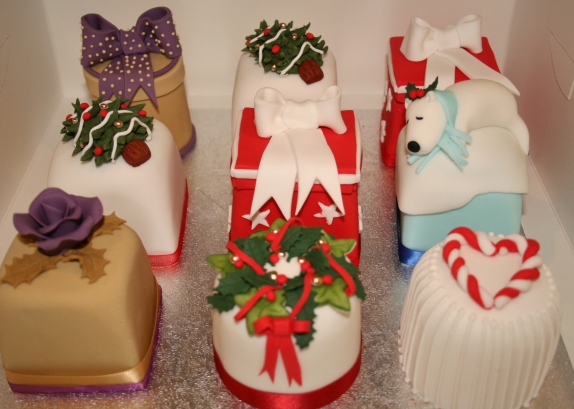
Anyway, coming up with cake recipes and ideas these days is much like shutting the stable door after the horse has bolted, there’s not much left that hasn’t been tried already, however, reminding others of, perhaps forgotten, treats is the name of the game here.

IMG_1192
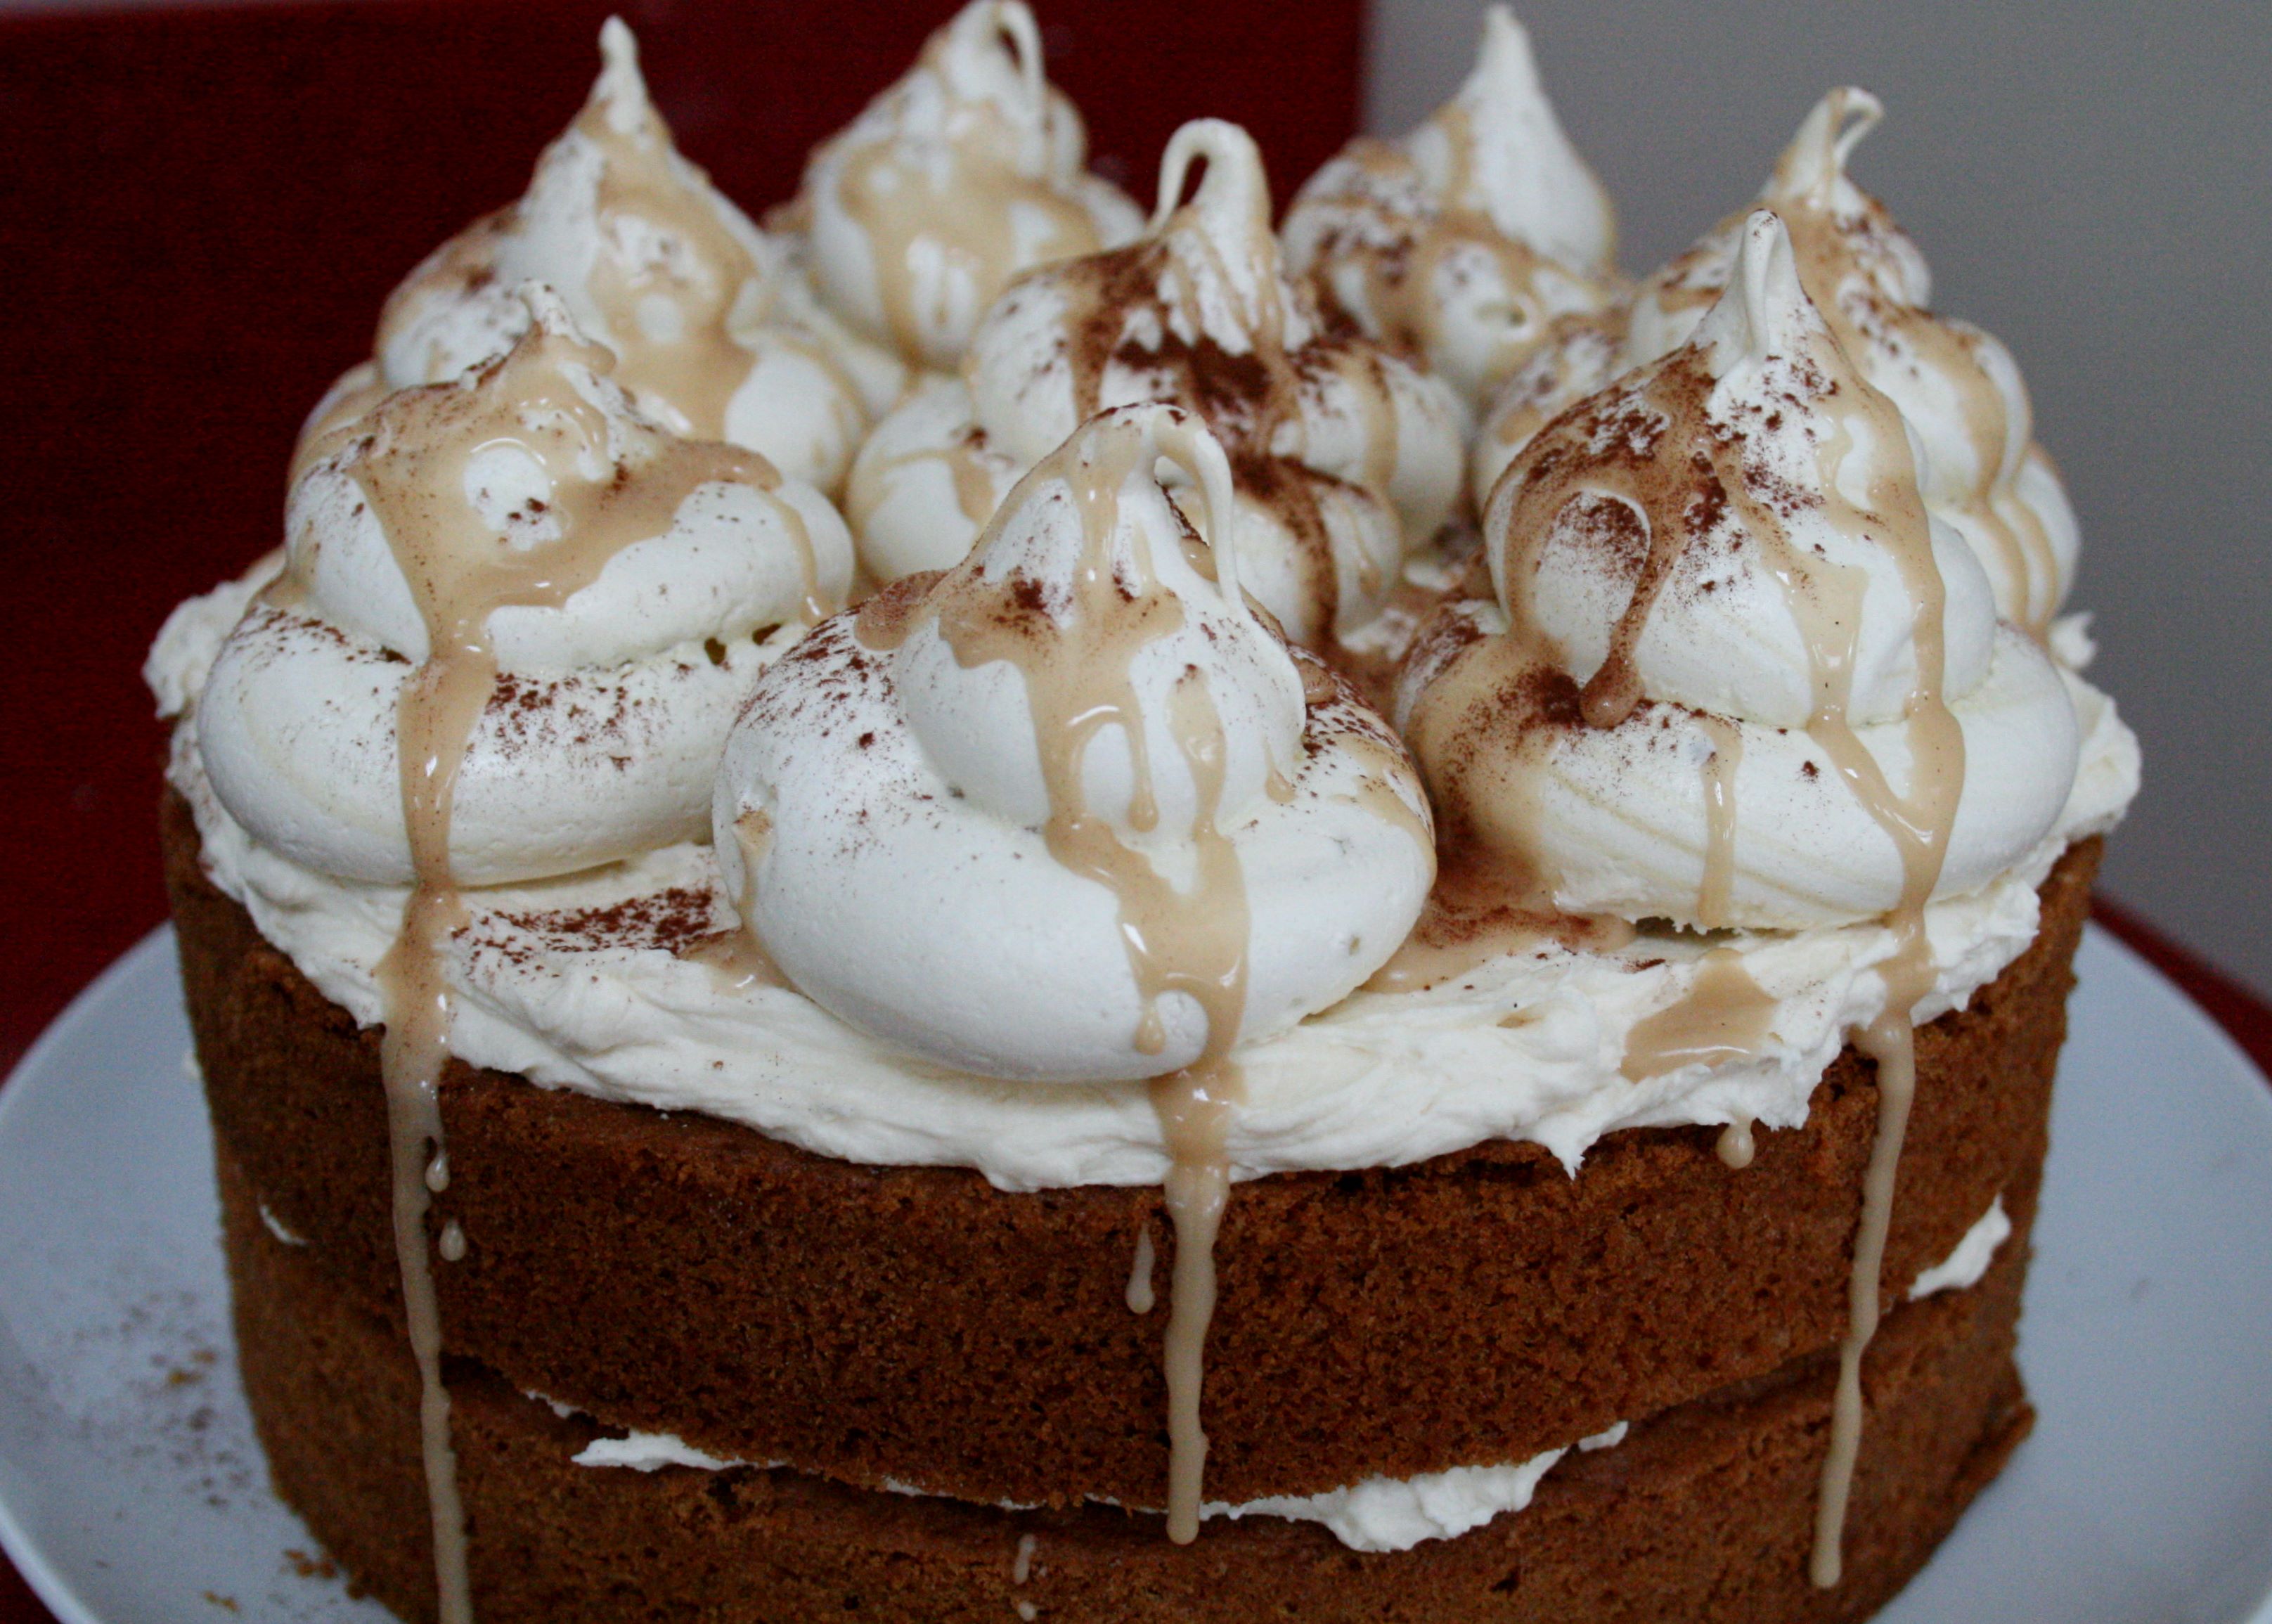
This is, as the title of the post suggests, Coffee Kahlua Crown cake. Meringue on top of cakes is a bit of a favourite of mine from the aesthetic point of view and although I have offered up something similar before it was a bit of a half-baked (!) affair, this is far more sophisticated both in looks and flavour.

So essentially we have a coffee walnut sponge cake, 6 smallish meringues, butter icing and glace icing to decorate. Where to start; making the meringues perhaps.

Very straight forward really, the day before you plan on making the cake, you will need 3 medium egg whites and 150g caster sugar, you can add pinches of salt and vinegar and vanilla extract, but it’s not necessary, egg whites and sugar is enough!

So whisk the egg whites so that they form stiff peaks but the mixture hasn’t gone over and become ‘dry’. This is clear when you see it so whisk more circumspectly as you reach the stiff peak stage to see off this point. Then, turn the motor on the whisk down a bit and start adding dessert spoonfuls of sugar gradually allowing each spoonful to be fully incorporated before adding the next one. You are aiming for a stiff, glossy white state. It must hold it’s shape. You can colour the meringue if you wish at this point using colour pastes ideally, or not as the case may be.

Preheat the oven to 120°C/Fan 100°C and cover a couple of baking sheets with greaseproof paper. You can then either pipe the meringue using a nozzle like this → IMG_0756

or just use 2 teaspoons to create blobs, a bit bigger than a golf ball, spacing them with room to expand a little on the baking sheets. this amount of mixture will probably make about 12.

Bake for 1 – 1.5 hours until hard to touch and slightly browned. Leave the door of the oven ajar to let them cool.

They will store for a couple of weeks in an airtight tin.

Next the cake: a Mary Berry recipe if the truth be told (and she must be credited) with a minor tweak.

So you will need: the oven on to 180°C/Fan 160°C, grease and line the bases  of two 8″ sandwich tins.

The ingredients are as follows: 4 large eggs, 2 heaped teaspoons of instant coffee powder (use the fancier instant espresso as it’s more of a powder and less granular), 225g soft butter, 225g caster sugar, 225g self-raising flour, 2 level teaspoons of baking powder, 50g chopped walnuts.

It couldn’t be easier, crack the eggs into a jug and add the coffee powder and whisk together (yes really), weigh out all the other ingredients into a bowl and then add the egg/coffee mixture. Beat together until smooth. Divide between the two sandwich tins and level with a spoon. Bake for 25 minutes or so until a small sharp knife blade comes out clean and the cake is starting to come away from the edges. Leave to cool in the tins initially and them remove to a wire rack until cold.

To assemble: for the buttercream you will need 75g softened butter and 210g icing sugar, 1.5 tablespoon of milk and 1 tablespoon of Kalhua. Begin by beating the butter and sugar together, slowly initially to incorporate the sugar into the butter otherwise there will large sugar clouds everywhere. Then add the milk and Kahlua and turn up the mixer to beat quickly for 5 minutes. Stop half way through and scrape the sides down to ensure everything is mixed evenly.

IMG_1191Lay the bottom half of the cake on a plate or cake stand, level the top of this layer with a long sharp serrated knife if necessary and then, coat with 2/3rds of the buttercream. Layer the top half of the cake on top and check whether it appears level. Spread the remainder of the buttercream thinly over the top of the cake and place the meringues (probably around 6) on top of the buttercream.

As a final flourish pop two spoonfuls of icing sugar in a small bowl and add just enough Kahlua to give a thick runny consistency so you can drizzle. Using a teaspoon go ahead and drizzle this icing over the meringue and cake. Dust with a little cocoa powder if you like.

The crowning glory of an Afternoon tea.

Salted Caramel and Sour Cherry Zillionaire’s Shortbread

BIG, big apologies for my absence from the blogiverse. We are having some building work done here at Cutest Cakes HQ so a combination of project managing, tea making, working, dog walking and everything that goes with organising two children has forced blogging so far down the list of priorities it has largely disappeared out of sight.

However that does not mean the recipes have dried up! This is a fantastic, post Lenten, splurge and for someone who isn’t into sickly sweet stuff, just the ticket.

IMG_0797

Making Million or Zillionaire’s shortbread is quite a lengthy and messy business. I make no apology for this, there is no getting away from making an effort sometimes, but if you can get hold of ready-made salted caramel, or ideally make it on a separate occasion and store it in the fridge to keep it more solid, this will reduce the faff factor.

You will need:

A jar of Salted Caramel such as Hawkshead Relish Salted Caramel Sauce.

This is a 320g jar which should be more than enough, stored in the fridge before using to keep it as solid as possible.

Alternatively I give a recipe for making Salted Caramel, this time use:

250g Caster Sugar, 4 tbsp water, 160ml Double Cream, 50g Salted Butter, ½ tsp Coarse Sea Salt.

If you haven’t made caramel before it is a bit of a scary process but you’ll be fine.

Put the sugar and water in a small saucepan and heat gently over a moderate to low heat to dissolve the sugar. Do not stir at all at any stage. Swirl the mixture around from time to time off the heat, but once dissolved allow the sugar syrup to come up to the boil and boil for around 5-8 minutes. During this time the syrup will become a dark ‘caramel’ colour and thicken. Swirl occasionally but that’s all. Once the desired colour has been reached, remove from the heat and very gently and slowly pour in the cream. At this point it will look like it has all gone wrong, don’t panic, add the butter and sea salt too, find a whisk appropriate for your saucepan, and whisk gently until a smooth sauce-like consistency is reached and all the butter has melted. A crusty shelf of sugar will have formed about 2cms above the bottom of the pan, just work round that, don’t try to dislodge it as you pour the sauce into a jug. Leave to cool. The odd stir as it cools might help to stop a crust forming.

After about 2-3 hours you will have a supercooled liquid (for the scientists amongst you), fridge until required, ideally overnight at least. You can transfer this sauce to a thoroughly clean, preferably sterile jam jar with a lid where it will keep for weeks!

So once you have resolved the caramel issue, you can move onto construction of this delicious confection.

You will need for the Shortbread: a 6″ square, ideally loose-bottomed, cake tin, greased on the bottom and very slightly up the sides, 125g Plain Flour, 40g Caster Sugar, 80g Butter, softened

and finally for the topping you will need: 50g Milk Chocolate, 80g Plain Chocolate and 50g Dried Sour Cherries.

So to make the shortbread, pre-heat the oven to 180°C/Fan 160°C, then mix the flour and caster sugar in a large bowl and rub in the butter until the mixture resembles fine breadcrumbs. Knead the mixture until it forms a dough and then press into the base of the cake tin to give an even layer. Prick with a fork and then bake for 15-20 minutes until firm to the touch and very lightly browned.

Allow to cool completely, then spread with the chilled caramel sauce (as much or as little as you want) and return to the fridge whilst you melt the chocolate, separately in Pyrex bowls, either over a couple of pans of simmering water or in the microwave until you have two bowls of smooth molten chocolate. Remove the caramel biscuit base from the fridge and dollop spoonfuls of first the milk and then the plain chocolate over the caramel, you can smooth it all over or not as the case may be and then dot with the Sour Cherries. Return to the fridge to allow the chocolate to set, once cooled, which won’t take long.

Now, this particular recipe does not result in neat solid squares of chocolate caramel shortbreadIMG_0790, as you can see. This is a decadent, stuff it in, finger licking, lip smacking, Nigella style delight, and having eating way too much of this over Easter has resulted in a bit of diet action at this end.

So find a REALLY sharp large knife. Remove the tin from fridge, loosen the contents round the sides of the tin with a palette knife and then push the loose bottom of the tin upwards to release the shortbread the transfer, minus the bottom of the tin, to a large plate, the caramel will start to ooze as you can see. Ignoring this, cut into squares and the dish up as required. Return any uneaten squares to the fridge where it will keep for days, if you can stand to leave it alone.

Yummy.

Blueberry, Apple and Almond Crumble: Probably the yummiest crumble in the World.

IMG_0710

I am feeling very pleased with myself over my latest food marriage revelation. I haven’t particularly noticed any chatter about just how good blueberries and almonds are together, but I am starting to match them up all over my cooking.

It all started when I was sent an enormous bag of dried blueberries as a Christmas present from Canada. In fairly typical North American style, provisions are usually supplied in generous quantities so having opened said present I have been attempting to add dried blueberries to anything and everything. They are fantastic in salads, both green and couscous, as some here might recall. They can obviously be added to anything one might put dried fruit in, can’t say I’ve tried them as a substitute for fresh in pancakes but they have been featuring in my granola recipes of late.

Regular readers of this blog may be aware that I am a huge fan of granola and have been tweaking the basic recipe (here) from time to time. If you are interested in the blueberry almond version then proceed with the quantities of rolled oats, desiccated coconut, butter and honey as previously given and use 80g pumpkin seeds, 80g blanched almonds, roughly chopped, and 80g dried blueberries. Make up the granola in the usual way, that is to say, melt the butter and honey together and combine in a large bowl with all the dry ingredients except the blueberries so that the dry is coated with the wet. Spread over a baking sheet and bake at around 160°C/Fan 140°C for 30 minutes stirring from time to time until all appears toasted. Remove from the oven and allow to cool completely. Then add the blueberries and store in an airtight tin/tub.

However, the triumph, I think, is my crumble. As a household we have been happily munching on this with unparalleled enthusiasm. If you can get hold of the larger dried blueberries then that is definitely worth the expense but the smaller winberry like ones which are more prevalent here will work fine too.

This serves 4, so double up for a Sunday lunch pudding with left overs, but this is so quick a smaller mid-week one might be just the thing.

You will need for the filling: 2 medium Cooking Apples, peeled, cored and roughly chopped, around 60g fresh Blueberries, a handful of dried Blueberries, ½ tsp Cinnamon, 25g brown Sugar, 2 tbsp Water.

Pop the apple, water, sugar, cinnamon and dried blueberries in a saucepan and cook covered over a low heat for 10 to 15 minutes until the apple pieces are soft. Shake and stir from time to time. In the meantime prepare the topping…..

You will need: 125g Plain flour or a mixture of plain and wholemeal, 40g Butter, softened, 50g light Brown Sugar, ½ tsp Baking Powder, 30g Toasted Flaked Almonds (try to buy the pre-toasted ones as toasting them yourself is a bit of a palaver).

Again it’s all very simple: in a Kitchen Aid type thing or alternatively by hand rub the butter into the flour and baking powder, stir in the sugar and the almonds. (if using a Kitchen Aid it is very quick, use the beater attachment and combine on a low speed until you have the breadcrumb consistency).

IMG_0714Once the apple is cooked, dollop into your crumble dish or a Pyrex bowl even, top with the fresh blueberries and then sprinkle over the crumble topping, bake at 190°C/Fan 170°C for 20-30 minutes until browned on top. Serve for preference with ice-cream, that Cotswold Winstone’s Vanilla they sell in Tesco and Asda is only very lightly vanilla flavoured so is more like Latte di Fiore, the milk ice-cream the Italians make. Yummy, Yummy, Yummy……

Moroccan Rose Cupcakes

IMG_0649

This is an extravagant name perhaps but these have a wonderful aromatic sweet scent conjuring the exotic, heat, spices…..

I have had a thing about Morocco for a number of years. I’m desperate to experience the souks, food, weather, countryside, camels, architecture, sunsets so in other words, every facet of Moroccan life. We nearly booked a holiday there a couple of years ago and then the Arab Spring sprang and we acquired cold feet. The closest I have come so far therefore is a holiday as a child to southern Spain where, for a couple of days, the warm Saharan winds blew across from Morocco via the Gibraltar straits. So near and yet so far.

IMG_9287In theory these should be called something Turkish as rose-water is the main flavouring in Turkish Delight, something I had a go at last summer, but the interior of the cupcakes is what makes them special and the swirly rose-sunset colours makes me think I can get away with the Moroccan connection.

I was actually experimenting with the idea of an ombre cupcake. This a fashionable idea where you make a cake in several layers where each layer is a slightly different shade of a particular colour starting with the deepest shade at the bottom and graduating to the palest shade at the top. Most cakes contain about 4 layers. This sounds like quite a faff and you need to be making quite a big cake. I thought I might try the theory in a single cup cake and this is the result. The rise in the batter creates an uneven pattern, but with a little bit of tweaking, such as greater variation in the colouring of the batter, I think one can achieve a more pronounced effect.

So the recipe I used was more or less the basic Hummingbird Bakery cupcake batter one as follows:

For 12 – 16 cupcakes: 80g softened Butter, 280g Caster Sugar, 240g Plain Flour, ¼ tsp Salt, 1 tbsp Baking Powder, 2 large Eggs, 240g Whole Milk, 2 tsp Rose Water.

Preheat the oven to 190°C/ Fan 170°C and fill a 12 hole muffin tin with paper muffin cases.

In a bowl combine the butter, sugar, flour, salt and baking powder and the beat together until to achieve fine breadcrumbs in consistency. In a jug combine the milk, eggs and rose-water and whisk together with a fork. Add ¾ of the liquid to the breadcrumb-like mixture a beat slowly until all combined. Add the rest of the liquid, beat again slowly until mixed in and then turn the speed up to medium and beat until you have a smooth batter. The day I tried this was freezing and the butter was not quite soft enough which left the batter a little grainy. This really doesn’t seem to make any difference to the cooked cake and as you can see it still rose plenty!

IMG_0641Anyway once you have the finished batter, divide the batter between 3 bowls by weighing the mixture as you go. Then add food colouring paste carefully with a cocktail stick and blend into the batter with a spoon until you achieve the desired shade of a particular colour, in this case pink.

Add equal quantities, using a single tablespoon measure, of the first shade to each muffin case, then add a tablespoon measure of the next shade and then repeat for the third shade. Humming Bird batter can be quite runny like golden syrup or honey so the second and third layers of batter can be poured over the previous layer, keeping the spoon moving as you go so that you have an evenish layer. If the mixture is thicker and won’t pour then tease out the batter to cover the previous layer with the tip of a knife or teaspoon. I appreciate this is a bit of a faff, but it is an attractive and unusual effect.

Bake for 19-20 minutes or so and leave in the tin for 5 – 10 minutes before turning out to cool on a wire rack.

To make the butter icing is the usual recipe, so for 12-16 cupcakes: 160g soften Butter, 450g Icing Sugar, sieved, 50ml of Milk and a few drops of Rose Water. As described before, beat the butter and the icing sugar over a low speed until there is a sandy consistency, then add the milk and turn up the speed to medium and beat for 5 minutes until you have a light fluffy icing. You can then stir in a few drops of rose-water and also streak through the icing a tiny amount of pink food colour to give a pale pink ripple-y effect. Spread or pipe the icing on as you wish and decorate with rose petal crystals, cut out rose petals if you have the cutters and paste, actual rose petals or best of all a sprinkling of chopped pistachios. Yummy.

1st Blogiversary: Cake Pops top the Menu

It’s a bit of a cliché but I can’t believe it’s been a whole year. At the start, blogging more or less filled any spare time I had. January is usually a quiet month for cakes as everyone tightens their belts, financially and physically, so it seemed like the perfect moment to be pouring over the ins and outs of WordPress, picking themes and figuring out the widgets. There seemed to be a lot of explaining to do too, the posts were lengthy and full of my take on this, that and the other. As the year has worn on I seem to have got that out of my system and during busy and less busy times, the blogging frequency is adjusted accordingly and the speed it takes to write a post has dropped dramatically making for a fantastic equilibrium: part diary, part publicity, part community with followers and fellow bloggers becoming part of my social make up as I predicted it would. I love it.

The cake pops post is STILL the most popular, the original post is here. I should probably reblog or rehash it in some way, but Bakerella gives such a good tutorial on her You Tube clip that it barely seems worth repeating it. I make them regularly, but almost never as a commercial product. I haven’t particularly got into decorating them as kittens or snowmen, the standard pop sprinkled with Hundreds and Thousands seems to be attractive enough for school events or kids parties. I have gone off piste a couple of times though and these are the results:

IMG_8750

Cake Pops made to look like truffles, but this cake needed to be ALL cake so even the truffles were cake too. In fact the popless cake pop works well as a little something to have with a cup of coffee!

At Christmas time I adapted again, for child 2’s school Christmas fair, and came up with these:

IMG_0561

The reason the tops are pink is that you can now buy strawberry flavoured white chocolate buttons which melt beautifully. They can be used to coat the pops instead of candy melts which are a pain to work with. I think you can get orange flavour too……

The other popular posts are the unloved vegetables. I’m amazed at the reception they receive. The most popular was one about kale; of all things! It just goes to show that searching for cake ideas and what to do with left over greens are exactly what makes the internet so valuable, but anyone reading this hardly needs me to tell them that.

Tarty Seville Orange Tart

IMG_0595

My Brother’s birthday is at the end of January and mine is at the beginning. As a rule two things happen in between: if we are going to have snow, that’s when it will arrive and it duly has and my parents (yes that’s right both of them) make their annual supply of marmalade.

Currently I am not involved in this operation although at some point fairly soon I am going to have to acquire the Knowledge in that traditional hand me down sense. My better half has managed to end up on the distribution list and so will be looking to me to pick up the mantle eventually as he gets through his stock, more or less single-handed, long before the annual boiling comes round again. I have to say I haven’t even attempted to make the stuff at all, despite being a dab hand at jam, but the presence of Seville oranges in farm shops and occasionally in supermarkets does leave me feeling a little left out.

I need a distraction; Nigella makes the most delicious Seville Orange ice-cream, see :Nigella.com/No Churn bitter Orange Ice-cream, for some reason I cannot link this today, I think it’s absolutely wonderful being a bit of a tarty fan.

I have come up with a tart however as lemon tart is a favourite of mine and this I suspect would be a first cousin after all…

The recipe is basically Mary Berry’s but as the generic tart seem to be essentially the same list of ingredients whose-ever you make and as I have altered the prime ingredient I shall claim this as my own to some degree.

You will need:

For the sweet short crust pastry: 110g cold Butter, diced, 200g Plain Flour, 2 tbsp Icing Sugar, 1 Egg Yolk, cold Water

Just whizz the flour and the butter in a food processor until you have fine breadcrumb consistency, stir in the icing sugar and add the egg yolk and drizzle in enough cold water to form a ball of dough by whizzing again. You can always rub in by hand and then mix in the egg yolk and water by hand with a knife instead. Once you have a ball of dough, lightly roll out and line a greased 8 or 9″ loose bottomed tart tin and trim. Pop the pastry case in the fridge for 20 minutes followed by 10 minutes in the freezer, meanwhile….

For the filling you will need: 2 large Eggs, 90g Caster Sugar, 150g Ground Almonds, 85ml of whipping or double Cream, 2 Seville Oranges, zest and juice.

Combine all the ingredients in a bowl and beat together well.

Preheat the oven to 180°C/Fan 160°C, once the pastry is chilled, remove from the freezer, add greaseproof paper and baking beans and bake blind for 10 minutes followed by 5 minutes without the paper and beans. Pour in the filling and bake again for 30-35 minutes. If you only have an 8″ tart tin there will be left overs, individual tarts (like jam tarts) can be made with a muffin tin.

Optionally you can make a glazed topping, you will need: 1 Seville Orange, 150g Caster Sugar, 135ml water.

In a frying pan, add the water and the sugar and gently heat to dissolve the sugar and then allow to boil for 10 minutes or so. Meanwhile slice the oranges thinly, discarding the pips, and then add them to the syrup and boil gently for another 5 minutes. If you have time transfer the whole lot to a bowl and allow the slices to soak for an hour or two.

Once the tart has cooled a little, arrange the orange slices and pour on the syrup, you may need to heat up the syrup to allow it to pour. Otherwise if you don’t fancy the glazed topping just sprinkle with icing sugar. Yummy.

Sour Cherry and Velvety Chocolate Loaf Cake

IMG_0585

Light as a feather and velvety smooth with a delicious tang in the aftertaste, this is wonderful.

I have made it my New Year’s resolution to think up more cake recipes. I have found in the past that I have shied away from actually developing my cake ideas as the precise nature of baking demands skills in construction I felt I was lacking in.

Are there rules with these things?

Once you get past a basic sponge (a foolproof method is supplied here), it does seem from recipe books that there are no hard and fast rules for success. Unpicking the secrets however seems easier with American style recipes so I have started with an offering borrowing some ideas and ingredients from across the pond.

I had an urge to buy buttermilk and a packet of sour cherries this week, now that the supermarket shelves are clear of the festive staples, without any real plans. Consequently the kids ended up with blueberry buttermilk pancakes this morning, and once the buttermilk pot was open this cake idea followed swiftly on behind. It has gone down very well. It tastes great, warm or cold and all the cherries have not sunk to the bottom!

You will need: one large loaf tin the base of which should measure around 19/20cm x 8/9cm and around 6cm deep.

Ingredients: 190g Unsalted Butter, softened, 190g Caster Sugar, 3 large Eggs, 150g Plain Flour, 50g Cocoa Powder, 1 tsp Baking Powder, pinch of Salt, 125ml Buttermilk, 75g (1 packet) Sour Cherries (dried), 1 tbsp Kahlua (optional)

  • Preheat the oven to 170°C/Fan 150°C, grease and line the loaf tin with greaseproof paper. Just screw it up into a ball and smooth it out again and then line the tin with it, nothing too precise.
  • Pop the sour cherries in a bowl and steep in the Kahlua, if using, otherwise cream together the butter and sugar until light and fluffy using something like a kitchen aid or hand-held mixer.
  • Add the eggs one at a time, slowly, and beating well between each addition.
  • In a separate bowl combine the flour, cocoa powder, baking powder and salt and then sift gradually into the egg mixture folding carefully as you go. The mixture might seem a little dry but never fear as you are about to fold in the buttermilk followed by the sour cherries and their residual liquor if using.
  • Dollop carefully into the loaf tin and push gently into the corners then bake in the oven for about an hour. Check after 50 minutes or so and you can turn the oven up 10°C if you wish at that point. Anyway a cake tester should come out clean.
  • Leave to cool in the tin initially on a cooling rack and remove from the tin and greaseproof paper once just slightly warm.

You can eat this warm or cold, with or without cream, yoghurt, custard etc. The moist interior means it works just fine on its own. However a little piece of luxurious eating at this abstemious time.

The American influence would be the buttermilk and dried fruit in a sponge recipe, a combination I adore, but hasn’t really caught on here …… yet.

Mini Mincemeat Tarts

IMG_0548

Just before we get into mincemeat tarts, here is the result of the Decorate your own Christmas cake Workshop held last Friday. I had an intermediate group, so that’s students with some prior modelling/decorating experience. A Christmas wreath with sparkle -y roses and a festive robin.

Here are some of the gorgeous cakes produced by the students and the demonstration in progress…. As you can see there is always a unique element to each cake even if we are essentially producing the same thing.

IMG_0530

IMG_7977

This design is fairly easy to achieve, sugarpaste can be bought from specialist cake shops in a variety of colours or purchased online and with the addition of a little Tylo powder, a food thickener, modelling paste can be produced. This is much easier to use when cutting out foliage such as holly and ivy as the paste is stiffer. Foliage plunge cutters are widely available.

Robins are very easy to produce: again using modelling paste form an egg shape and fashion a head and a tail. Add a red breast from a disc of red paste, eyes and  a beak and wings. Claws from black or brown complete the design. A robin would also look very good on a chocolate log.

IMG_0518
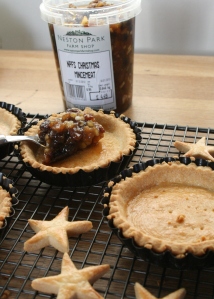
So on with the mincemeat tarts. I am including a recipe for this as they are a Christmas staple, unfortunately widely overlooked as a culinary delight and easily relegated to shop bought status. However with a little bit of forethought, care and attention can provide a delicious dessert all on their own with a little cream or ice-cream and easy peasy to produce at a stressful time.

Firstly acquire some really good mincemeat (making your own is a bridge too far). Farm shops are very good for this or the best quality you can afford in the supermarket. The second trick is to have a go at making your own pastry. I know I know, the perceived wisdom is that making your own pastry is a waste of time but trust me, if you have food processor it takes seconds, and you get a MUCH better result. It also behaves itself a lot better too (much less shrinkage).

So the sweet shortcrust recipe: the one I use is Rachel Allen’s, but as these things are really a bit of a standard thing I’ll include the details here.

You will need for 6 tartlets: 110g cold butter, diced, 200g plain flour, 1 tbsp icing sugar, 1 egg yolk plus 1 egg beaten for glazing.

Preheat the oven to 180°C/Fan 160°C. Grease your mini tart tins (loose bottomed for preference) with butter, pop the diced butter, sugar and flour in the food processor and whizz until you have coarse bread crumbs, add at least half the egg yolk and whizz again until it has more or less come together, then remove from the bowl to your work top and add a little more yolk if necessary and with a light touch bring together to form a smooth ball. Wrap in cling film and fridge for 30 minutes. Once chilled, roll the pastry between two pieces of cling film to a thickness of 3mm or so and using a large pastry cutter (size will depend on tart tin size) cut out at least 4 discs and press into the tart tins. Repeat the rolling out process with the remainder of the pastry to produce the last two discs giving you six in total. Freeze the pastry lined tins for 15 minutes. Then bake blind for 10-15 minutes, remove from the oven, brush with a little left over beaten egg yolk or beaten egg if necessary and return to the oven for 2 minutes max. From any remaining pastry cut out stars, brush with beaten egg and bake, on a greased baking sheet, for 5-10 minutes with the pastry cases until lightly browned.

These can then be held in this state for as long as you like, or frozen…..

When you are more or less ready to eat them, dollop 4 or 5 heaped tsps of mincemeat in each tart tin, top with a star and bake at the same temperature as before for 10 minutes or so. We are trying to get the suet in the mincemeat melted but not overcook the mincemeat so that it becomes browned and chewy. If they are frozen defrost them before you start.

Once out of the oven remove from the tins and sprinkle copious amounts of icing sugar over. Delicious.

I’m going to give my favourite Christmas dessert recipe in a few days, a warm fruit salad, perfect after a rich meal….see you then

Perfectly Iced Christmas Cakes

It’s getting busy here at Cutest Cakes HQ, funnily enough, not with Christmas Cakes primarily. However today has been individual iced Christmas cakes all the way.

IMG_0497

Some of these are my own designs, well most of them are, actually, but the sleeping polar bear is adapted from a Mich Turner design. Mich runs The Little Venice Cake Company and is a food hero of mine. It was watching her on some TV programme that got me into icing individual cakes in the first place.

Now icing cakes is one of those secrets, a bit like what it’s really like to give birth, that is rarely revealed. The question I am asked the most in this business is how I get the icing on the cake so smooth in the first place. I even run annual courses in this as it seems friends and clients will pay good money to be taught this technique.

As far as royally iced cakes go, find a recipe, Delia or Mary are good here, but add about 1 teaspoon of glycerine (sold by Silverspoon, amongst others, in supermarkets). The glycerine softens the dried royal icing, so that when it is cut into, it doesn’t shatter everywhere. One can achieve a smooth finish with royal icing but unless your name is Eddie Spence (royally iced wedding cakes for Royalty are his speciality) or you were taught this skill in domestic science about 50 years ago, I wouldn’t design a cake with this in mind.

Sugarpaste on the other hand is a total delight to work with and achieving a smooth finish requires 2 or 3 simple steps and some practice. Sugarpaste was in fact developed in Australia as royal icing doesn’t always set in potentially such a hot climate. It wasn’t introduced into the UK until the 1970’s in the modern era although a quick search about would suggest that making sugarpaste was something that might have been going on as far back as the Eighteenth Century.

So the rules:-

1) Always level the top of the cake (i.e. cut off the dome-y top) and then invert the cake so that the bottom becomes the top. Professional cake makers will get out spirit levels and the like to ensure the new top is flat, but this is probably unnecessary unless you are planning to charge for the cake or stack more that one layer.

2) Use plenty of sugarpaste and do not roll out too thinly. The rolled out icing should be 5-6 mm minimum thickness and you will need to allow 1 kg for a 6 ” cake and 1.5 kg for an 8″ cake. Knead the sugar paste so that it is warm and pliable before attempting to roll it out. Left overs will keep for months if not years.

3) Keep the paste moving. As you roll out use plenty of icing sugar, turn the paste very regularly and ensure that the paste does not become stuck to the work surface at any stage. Before attempting to cover the cake check the icing is still loose.

4) To help achieve a professional finish, coat with an undercoat of marzipan, a thinner undercoat layer of sugarpaste or a smooth coating of buttercream. Cakes should be brushed with cooled, boiled sieved apricot jam before under coating with marzipan or sugarpaste.

5) Brush the undercoat with brandy or cooled boiled water before applying the top coat. (For buttercream and sugarpaste coatings you won’t need apricot jam or the brandy, just ensure the buttercream is smoothly applied just before you roll out the sugarpaste. Work fairly quickly or the buttercream dries out and the sugarpaste will not stick)

6) Apply the top coat to the cake by picking it up with hands and forearms to make the transfer NOT draping it over a rolling-pin. Carefully smooth the paste starting with the top of the cake and working down the sides, if folds and pleat start to form, pull the paste out and smooth flat against the cake, if it is thick enough the paste will literally mould to the cake with a little coaxing and pressing. Then:

Get hold of a cake smootherIMG_0500

These are the secret to success, they cost less than a fiver and just allow you to smooth out any finger marks and other dings and divets, once you have the paste hugging the cake, to achieve that perfect finish.

Angled pallet knives also help with moving the cake about without leaving marks in the icing.

If you can, leave the cake for 24 hours before you decorate it.

Simple huh, it does take a bit of practice, but once you have got the hang of it, you’ll find yourself in a relatively exclusive club.

Tagine Inspired Shepherd’s Pie and Word about a Christmas Workshop

Just before we get into the nuts and bolts of a Moroccan style Shepherd’s Pie, I am going to make a little announcement:

For those who are resident in Wiltshire (realistically,) although anyone is welcome I am running my second ‘Decorate your own Christmas Cake Workshop‘ on the 14th December 2012. We won’t be tackling anything quite like this ‘Night before Christmas’ Cake just yet, but you will have something to wow your family.

It will begin at 9.45am and run through until around 3pm. Bring your own cake, un-iced, and your lunch. It will cost £25 plus the cost of the decorating ingredients, contact me via the messaging service in Facebook (see the side bar and click through).

Last year we managed this↓ (not sure why the background is so dark, perhaps it was about to snow!)

Anyway, on with the latest recipe. This is something concocted some years ago for Bonfire Night, the sweet heat seemed appropriate for such an event. I have always been a fan of Tagine, but find the soupy, stew-y nature of it a little unsatisfying in the depths of winter, so I came up with the following (serves 4):

You will need for the meat sauce:

800g Lamb Mince, 1 large Onion, 2 cloves of Garlic, crushed, Olive Oil, 2cm piece of fresh Ginger, grated, a pinch of Chilli Flakes, 2 tsp Paprika, 2 tsp Cumin, ½ Cinnamon stick or ½ tsp Ground Cinnamon, ½ Red Pepper, ½ Yellow Pepper (or a whole Pepper of one colour instead), 100g Ready to eat Apricots, roughly chopped, 1 tbsp Runny Honey, 2 tbsp Fresh Coriander or Flat Leaf Parsley Chopped, 2 tsp Tomato Puree, a slug of Red Wine (optional), Salt, Pepper.

For the Mashed Potato topping:

800g to 1kg of potatoes, peeled, boiled and mashed with butter, a tiny slug of milk, salt and pepper in the usual way.

Quite an ingredients list for this! But it is well worth it. Peel the potatoes and set them on the hob to boil and then simmer in salted water as usual. Keep and eye on them as you start the meat sauce, once tender, drain, add the butter, milk and seasoning and mash. You want quite a dry mixture, not too sloppy here as the meat sauce is quite saucy!

Meanwhile, fry off the lamb in a frying pan to remove the excess fat and heat the oil in a medium saucepan and fry the onion until transparent and soft, then add the garlic and stir round for a minute or two along with the ginger and chilli flakes. Transfer the lamb with a draining spoon to the onion mixture and then add all the other sauce ingredients apart from the fresh coriander or parsley. Add around 300ml boiling water until you have a sauce type consistency. Allow the whole lot to come to the boil and then simmer for 20-30 minutes whilst the potatoes are cooking. Stir the meat sauce from time to time and add a little more water as necessary so that the mixture does not dry out and towards the end of the cooking time add the fresh herbs, you want to maintain some liquid at all times.

Preheat the oven to 200°C/Fan 180°C, decant the meat sauce into an ovenproof dish and top with the potato, spread the topping around with the back of a fork to completely cover the sauce. Bake for 30-40 minutes until the topping has crispy tinges and you can hear or see the sauce bubbling underneath…..

This one in the picture was made with part regular, part sweet potato as the topping which is very good too.

Previous Older Entries

The Cutest Cakes: Classic Cakes

Lilies and Pearls

The Cutest Cakes: Cupcakes

Rosebud Vanilla Cupcake

The Cutest Cakes: Individual Iced Cakes

Miniature Fruit Cake

Details for The Cutest Cakes can be found at www.cutestcakes.co.uk or if you click the image on the side bar you will be transported there.